Your car’s engine air filter catches dust and other debris before air reaches the engine. Checking it is a straightforward maintenance task on many vehicles, but the filter’s location, access method and replacement schedule vary by model.
This guide shows you how to inspect the engine air filter safely and decide whether it needs attention. It is about the engine air filter—not the cabin air filter, which cleans air for the vehicle’s interior.
What you will need
- Your vehicle’s owner’s manual, in print or online.
- A clean, well-lit place to park.
- A flashlight, if the filter housing is difficult to see.
- Gloves, if you prefer to keep dust off your hands.
You usually do not need tools just to look at the filter, though some housings use screws or fasteners. Check the manual before opening anything, and use only the access method it describes.
Steps: inspect the engine air filter
- Park safely and switch off the engine. Park on a level surface, set the parking brake and turn the engine off. Let the engine bay cool before reaching into it. Keep loose clothing and hands away from moving or hot parts.
- Find the engine air filter housing. Use the owner’s manual to locate the engine air cleaner or air filter. It is commonly inside a plastic housing in the engine compartment, but its position and appearance differ. Do not mistake it for the cabin filter, which is usually accessed from inside the vehicle.
- Read the access instructions. Check how your vehicle’s manual says to open the housing. Some use clips; others use screws or a different arrangement. If opening it would require removing a large duct, disconnecting wiring, or forcing a part, stop and get model-specific guidance instead.
- Open the housing carefully. Follow the manual’s directions and keep track of any clips or fasteners. Avoid pulling on nearby wires, hoses or sensors. If the housing resists, do not pry it open; confirm that you have released the correct fasteners.
- Note how the filter sits. Before lifting it out, take a quick look at its position and orientation. If the manual allows removal for inspection, lift it out gently and keep dust and debris from falling into the open air passage.
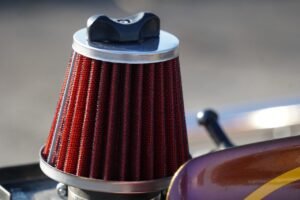
- Inspect the filter in good light. Look across the pleated material—the folded surface that captures particles. Check for torn or crushed pleats, gaps or damage to the frame or sealing edge. Also look for a heavy layer of debris or material packed into the folds. A filter that is damaged or visibly obstructed should be replaced with the correct part.
- Check the manual’s service guidance. Compare what you see with the maintenance instructions for your vehicle. Replacement intervals are not the same for every car, and driving conditions can affect how quickly a filter collects dirt. Use the schedule and inspection guidance for your exact model rather than assuming one mileage interval fits all cars.
- Reinstall or replace it correctly. If the filter is in good condition and the manual permits reinstalling it, return it in its original orientation. If it needs replacement, match the new filter to your vehicle and follow the manual’s fitting instructions. The filter should sit evenly in its housing so the edge seals as designed.
- Close the housing and check your work. Refasten every clip or screw you opened. Confirm that the housing closes evenly and that no tools or loose objects remain in the engine bay. If it will not close properly, reopen it and check the filter’s position rather than forcing the cover.
What counts as a dirty filter?
Some darkening is normal as a filter collects particles, so color alone is not a dependable pass-or-fail test. Focus on the condition of the filter: damage, a poor seal, or debris that is visibly packed into the pleats are stronger reasons to replace it. When the inspection is borderline, follow the owner’s manual or ask a qualified repair shop to check it.
Do not wash, oil or blow out a filter unless its manufacturer and your vehicle’s instructions specifically say that it is designed for that treatment. Many standard engine air filters are disposable. Cleaning the wrong type can damage the filter or leave it unable to do its job.
Tips and things to know
- Buy by vehicle fit, not appearance. Filters can look similar while having different dimensions or sealing edges. Check the part information against your vehicle’s year, make, model and engine, and verify the fit before installation.
- Keep the filter in place. Do not start or run the engine with the filter removed. Close the housing before using the vehicle.
- Keep dirt out of the opening. While the housing is open, avoid touching or dropping anything into the passage leading toward the engine.
- Don’t force unfamiliar parts. If access requires a procedure you cannot confidently follow, or a clip breaks, stop and consult the manual or a mechanic.
- Use the right schedule. Your owner’s manual is the best starting point for the maintenance interval. Dusty or otherwise demanding driving conditions may call for more frequent inspection, depending on the vehicle’s guidance.
A quick inspection can help you spot a damaged or heavily blocked engine air filter before it is overlooked. Follow your car’s own instructions, use a correctly fitting replacement when needed, and stop if access or reassembly is unclear. Once the housing is securely closed, you’re done.